Data Sources
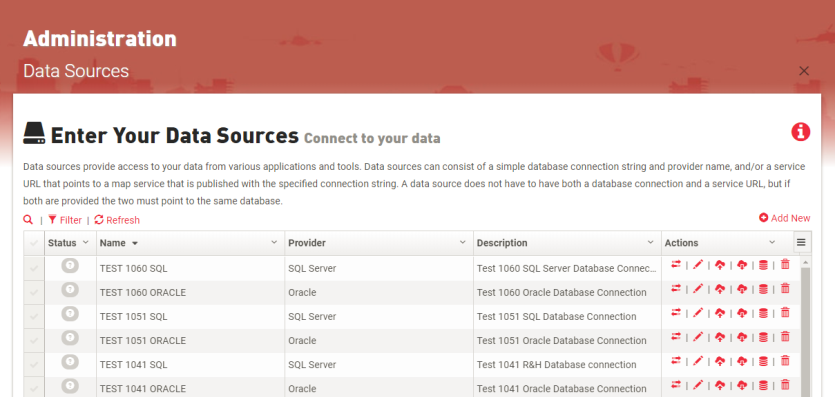
Data Sources provide a way to add, remove, and update the data sources that you wish to have access to within the application.
Usage
To add a new data source:
- Click + Add New to expand the new Data Source form.

Note: For different data base connection examples, click Examples in the upper right corner and select the example that best matches your connection type.

- Fill in the Name, Description, and Database Type.
- Enter the Connection String. Use the Test Connection button to verify the string.
 Click if entering a data source for a Configuration Store
- You have the option here for App Manager to automatically create a Configuration Store database for you on your selected database.
- Click the down arrow on the TEST CONNECTION button and click Test and create database if none exists.

- Enter the Associated Service URL.
Note: Once entered the URL will be tested and the result will be displayed below the input box.
- If you want the application to authenticate with ArcGIS for Portal, check the box beside Service requires ArcGIS for Portal authorization.
Heads Up! If you selected this option, you will need to ensure that TDS has been configured to use Portal for ArcGIS. See the Configure Portal for ArcGIS topic for more details. You will also need to add your ArcGIS for Portal URL in the Application Settings of App Manager.
- If the map service using branch versioning, check the box beside Data source uses ArcGIS Branch Versioning.
Heads Up! If you selected this option, you will need to add your Map Services Account Username and Password in Application Settings.
- Optional: Click More Options to enter the following information about your data source:
- Service URL LRS Extension - configure which extension the application should use for any given data source. If left blank, the application will default to the standard extension value of "LRSServer". If a map service is using ArcGIS Pro and Roads & Highways, then you must enter "LRServer" for the respective data source
- Description - enter a description of the data source.
- Database Schema/Owner - enter the schema or owner of the database.
- Spatial Reference ID (SRID) - enter the spatial reference ID (SRID) assigned to the database.
- Click Save.
- Click the search icon to expand the search field.
- Start typing the name of a data source.
- The list will filter to show matching data sources.
The Filter options lets you filter the data source table by Name, Provider, and/or Description.
- Click Filter.
- Enter the criteria for the name, provider, and/or description you want filtered into the applicable box.
Tip: Click Filter again to close the filter and refresh the privileges list.

- Locate the row for the Data Source you wish to test.
- Click the test icon pictured above.
Heads Up! This will only test the database connection. If the data source you want to test only has the associated service URL, it will fail this test even if that URL is correct.
To update an existing data source:

- Locate the row for the Data Source you wish to edit and click Edit (pencil icon).
- Make desired changes to the form input and then use the Test Connection button to verify the string still connects.
- Click OK.
This feature can be used to import an appropriately configured table (e.g., routeid, from/to measure, biz data, etc.) to be used in the other Rizing Geospatial applications such as Segment Analyzer. You can import CSV, Excel, or Access tables.
Heads Up! In order to use this functionality, Microsoft Access database engine 2010 must be installed on the TDS application server. This is a driver that allows external applications (like TDS) to read/consume Microsoft office files (like Excel and Access). If the proper version of these components is not installed on the server, the Import button will remain "disabled." Once installed, you'll need to either recycle the TDS Application App Pool in IIS, restart IIS, or Restart the Application on the Administration page under Actions for the Import icon button to become "enabled".
To import data to an existing data source:

- Locate the row for the Data Source you to import a table to and click the Import icon.
- Check the box beside Include Header Row to include the header row of the table.
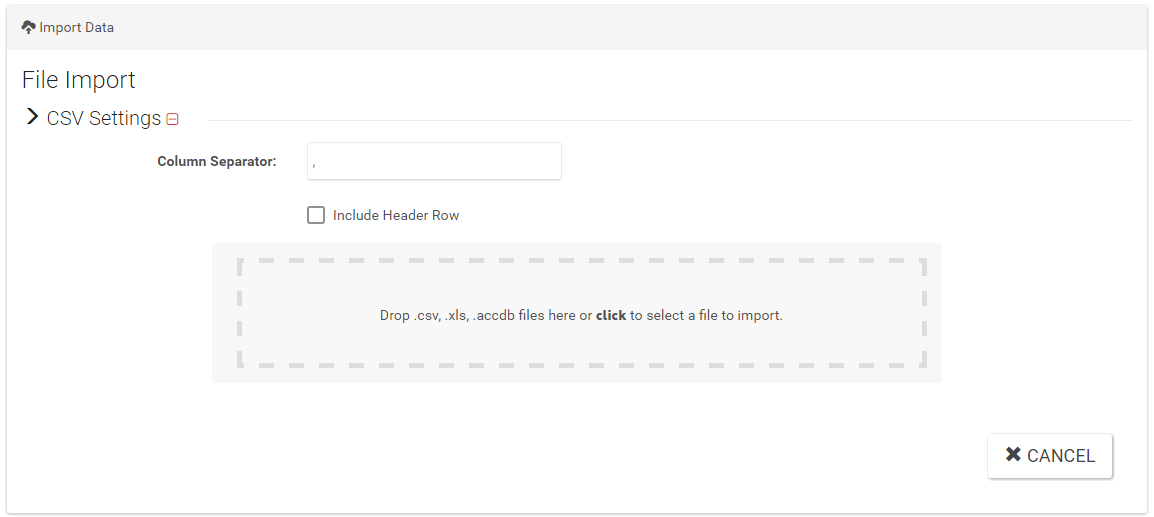
- Drag the table (or multiple tables) into the File Import area, or click inside the File Import area and navigate to the table you want to import.
- Check the table(s) you want to import then click Next.

- For each table you are importing, in Import Table Name input box enter the table name as you want it displayed.
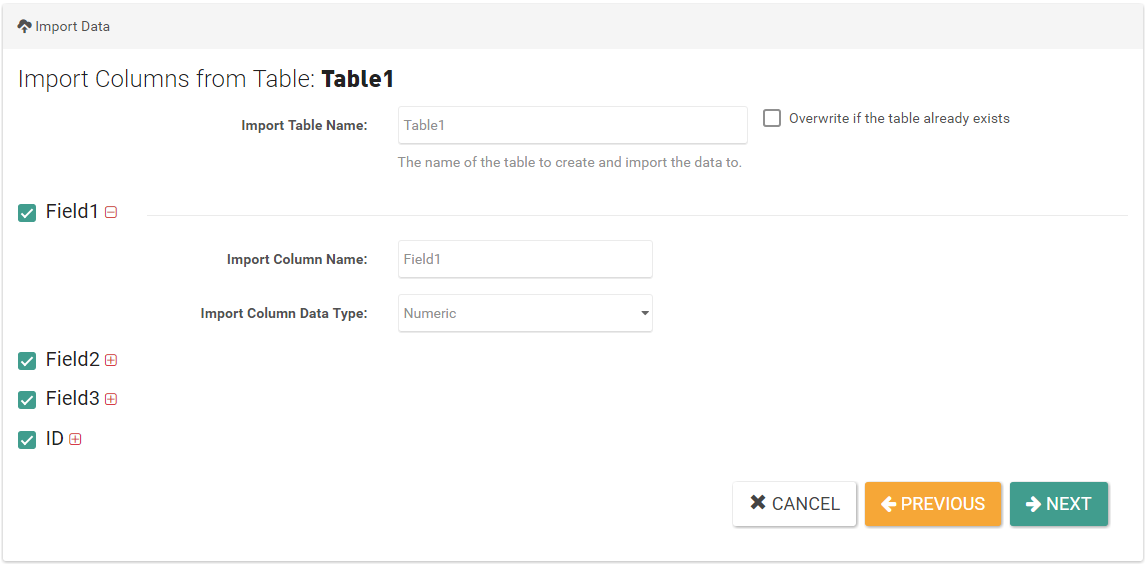
- Uncheck any columns you do not want included in the import (all columns are checked by default).
- For each column in the table you are importing, enter the Import Column Name and Import Column Data Type as you want it to be displayed.
- Click Next to go to the next table.
- When finished editing the tables, review your selections and when finished click Import.
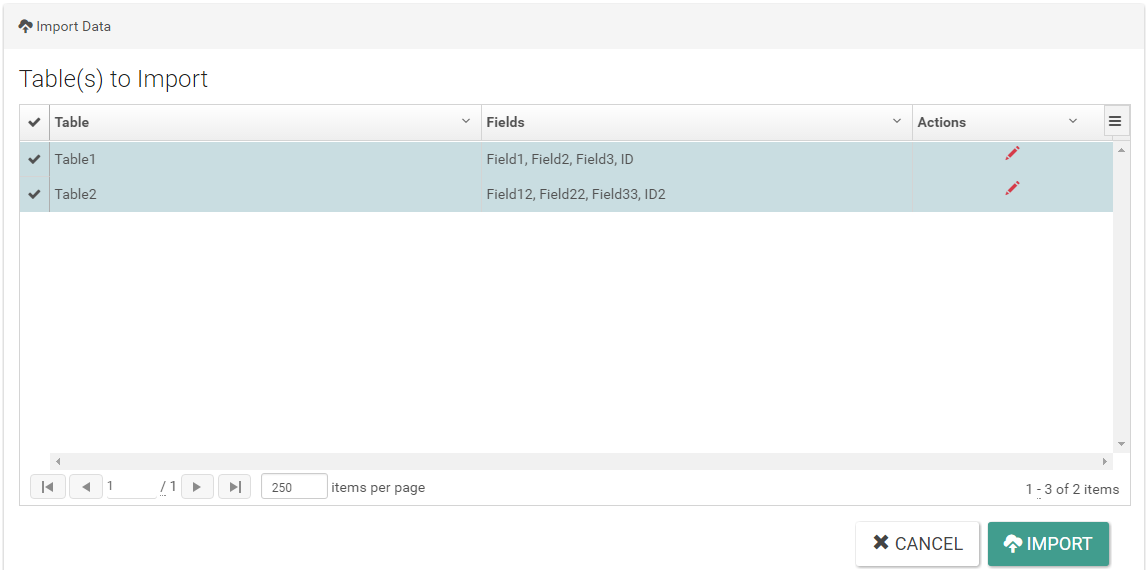
Tip: If you need to make further edits to the tables and/or columns, click the Edit icon in the Actions column.
This feature can be used to export a CSV file containing records from a selected data source.
Heads Up! In order to use this functionality, Microsoft Access database engine 2010 must be installed on the TDS application server. This is a driver that allows external applications (like TDS) to read/consume Microsoft office files (like Excel and Access). If the proper version of these components is not installed on the server, the Export button will remain "disabled." Once it is installed the Export button will become "enabled."
To export data from an existing data source:

- Locate the row for the Data Source you to export and click the Export icon.
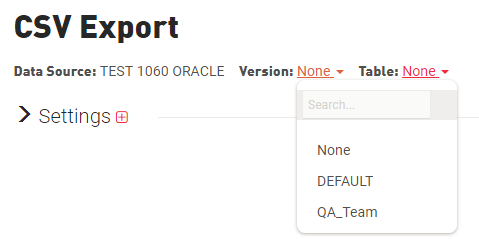
- Select the Version and Table from their respective dropdown lists.
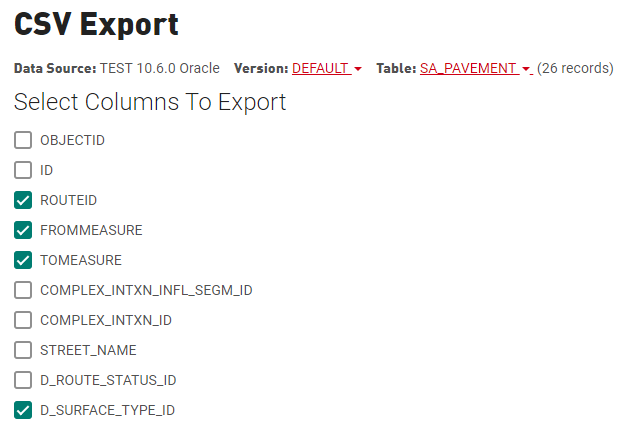
- Check any columns you want to include in the export (all columns are unchecked by default).
- Optional: Click on Settings to configure the following settings:

- Column Separator - enter the character the export will use to separate the columns (a comma is used by default)
- Limit Records - to limit the number of records exported, check this box and enter the number of records to export
- Include Header Row - uncheck to not include the header row (this is checked by default)
- Click Export to start the export of the csv table.
To view the Export History table:
- Click View Export History in the upper right corner of the Export Data form.

- Within the table, you have the following options:
- Search the Table - click the search icon, then start typing the name of a job
- Filter the Table - click Filter, then enter the criteria for the job or other column you want filtered
- Download a Job - click the download options icon, then select the output from the dropdown list
- Delete a Job - click the trashcan icon, then click Delete in the confirmation popup
- View Job Details - click Details and the job's details will be opened
- Click Hide Export History to close the table and return to the Export Data form.
To delete an existing data source:

- Locate the row for the Data Source you wish to delete and click the trashcan icon.
- Click Delete in the confirmation popup.
Note: If the users of the Data Source(s) will need to make changes to the network and update any tables that they are not the owner of, your database administrator will need to ensure that they have editor privileges so they can make changes to the network and update the tables.